To receive regular donations, you need one of the following plugins:
- FREE plugin: Subscriptions For WooCommerce – Subscription plugin for collecting recurring revenue, sell membership subscription services & products https://wordpress.org/plugins/subscriptions-for-woocommerce/
- PREMIUM plugin: WooCommerce Subscriptions https://woocommerce.com/de-de/products/woocommerce-subscriptions/
Recurring Donations with Subscriptions for WooCommerce (free plugin)
- Install Subscriptions for WooCommerce (free plugin): https://wordpress.org/plugins/subscriptions-for-woocommerce/
- Set up Subscriptions for WooCommerce according to the instructions
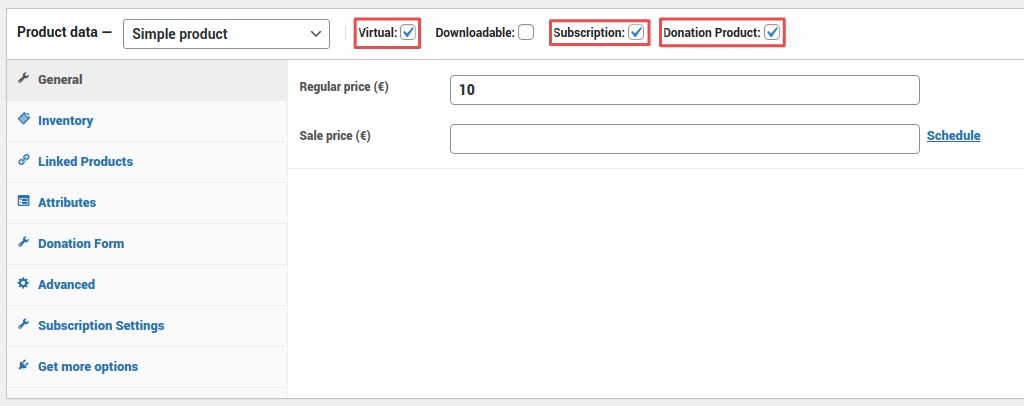
- activate “Virtual” & “Subscription” & “Donation Product”
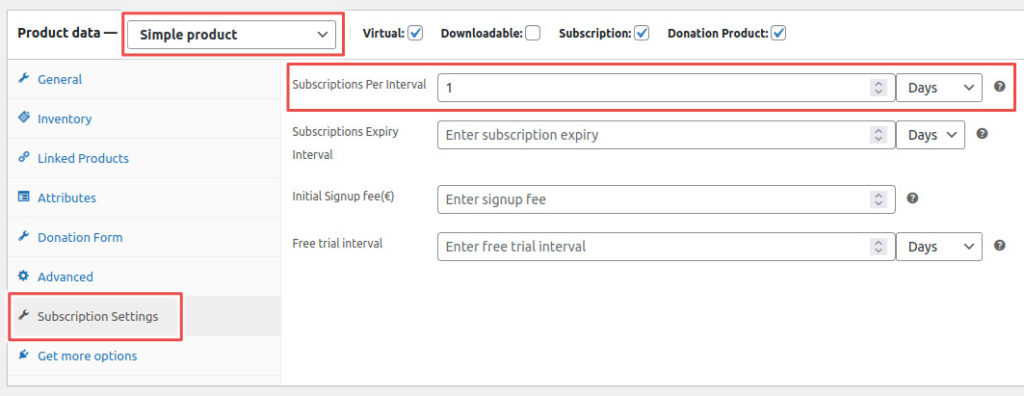
- make sure “simple product” is selected
- navigate to the Tab “Subscription Settings” and set up the schedule
Subscriptions for WooCommerce (free plugin) does NOT support variable subscription products.
Recurring Donations with WooCommerce Subscriptions (premium plugin)
WooCommerce Subscriptions is a premium extension for WooCommerce. It is licenced under GNU General Public Licence Version 3. That’s why you can legally download it online for free at various places. However, to benefit from support and updates, it is recommended to get the plugin from the WooCommerce Store.
You can use a simple subscription (only one donation schedule) or variable subscription (multiple payment intervals).
Simple Regular Donation (Simple Subscription – One Donation Schedule)
- Install WooCommerce Subscriptions (premium plugin): https://woocommerce.com/de-de/products/woocommerce-subscriptions/
- Add a new WooCommerce product.
- Make it virtual and donable. Under Product data, select “Simple subscription”.
- Set any subscription price and subscription schedule. The subsequent donation amount must be set, but is otherwise irrelevant as it will be overwritten by the donor later.
- Under “Donation Form”, adjust the settings of the donation form according to your wishes.

Variable Recurring Donation (Variable Subscription – Multiple Donation Schedules)
- Install WooCommerce Subscriptions (premium plugin): https://woocommerce.com/de-de/products/woocommerce-subscriptions/
- Add a new WooCommerce Product.
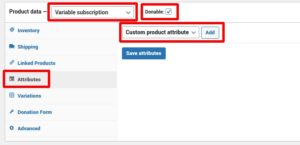
- Make it donable. Under Product data, select “Variable subscription”.
- Navigate to the tab “Attributes” and add a custom product attribute. This tutorial uses custom attributes, you can also use already created attributes.
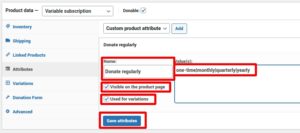
- Enter a name and various attributes, e.g. one-time|monthly|quarterly|yearly. Make sure to check “Visible on the product page” and “Used for variations”. Safe the attributes.
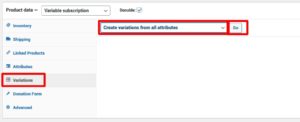
- Navigate to the tab “Variations”, select “Create variations from all attributes” and hit “Go”.
- Give each variation a subscription price and a subscription schedule, e.g. “every month” for monthly donations, “every 4th month” for quarterly donations. Check “Enabled” and “Virtual”.
If it is a one-time donation, make sure that “Expires after” is ended after a one-time payment. Since “every month” is selected in the example below, this must be “1 month” here. - Click “Safe changes” in the “Variation” tab and update the hole product.
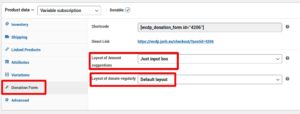
- Navigate to the tab “Donation Form”. Set the layout of the individual rows according to your wishes.
